woensdag 29 juni 2011

Baking data..

During development of the zombie shooter we were experiencing an increasing amount of loading times due to all of the new features which got added. This isn't unusual, since it is something logic as cause and effect. But the loading times were getting a bit too long. So we decided to take a look at it to find out where we possibly could find a speed up.


Some technical systems in the game use a lot of data calculated/generated during the loading stage, which takes time. One of those is the pathfinding system which uses the most data at the moment. It generates all of the node data needed for the zombies to walk from A to B during startup. As you can imagine, having a decent amount of nodes to be processed every time the game loads up takes time. Too much time in fact for our needs.


So how to solve this. Since it is a system which is 'calculating' things to be stored in the computer's memory for realtime use after loading, it is possible to capture this calculated/generated data. The trick is to save this generated data and store it in some sort of file from where it can be loaded directly during startup of the game.


Now having the data we need saved in a file, it doesn't need to be recalculated/regenerated anymore during loading. We could say, the (navigation) data is baked into a file. With the data already present in a file, it is possible to directly load the data into the computer's memory instead of calculating it first during startup. This is much faster than calculating/generating the data on every startup of the game.


The main drawback of doing things like this is the need of recalculating and saving data everytime something relevant to that data has changed in the game. The plan is to create a system which automatically detects changes, or at least is possible to force into a mode where the already saved data needs to be overwritten by new generated data.


A lot of technical talk, hopefully next post some more images ;)


-Joep

woensdag 22 juni 2011

Particle stuff!

Hi all,

Unfortunately, most of the time I am working on ‘secret’ projects or projects on which we simply cannot share as much as we would like. So this post will be about something I am doing in my ‘spare’ time. At least what is left of it ;)

As some of you might know I am a big fan of everything that involves particles. Especially explosions!

Unfortunately, Adobe Director’s own particle system doesn’t really suit my needs. It is ok for a lot of quick things but for the games we make it is a little outdated. For example; you cannot rotate or animate particles individually and you don’t have any blending options (additive blending) yet. Finally, there is no general time or speed multiplier for the entire particle system. Our games sometimes feature slow motion and so we’re unable to dynamically change the speed and lifetime of the system. All in all it was time for our own particle system. So about 10 games ago (more or less,..) I decided to create my own particle system from scratch.

At this time, 10 games later, I still haven’t got a perfect particle system up and running. Mostly because I noticed early on that creating a system that could do everything that I (or one of my colleagues) want is simply not possible. The variations are impossible to count. Furthermore, as I can’t go as low-level as the default Adobe Director particle systems I run into performance problems.

So as we speak we have a default particle system class which handles general particle behavior and when we need an additional or new effect we simple use this one as a base for new particle classes. The default setup handles birth, life, texture animation (if necessary), position, rotation and scale. For the transform properties we also have speed and direction. The slightly more advanced ‘default’ ;) version also does drag, gravity and wind. Each frame the particles are updated until they reach the end of their life after which the are deleted. When all particles are deleted the particle system cease to exists. For most particle systems we use planes (simple 2 triangles forming a square) on which we display the animated (texture). However, we could also use other types of geometry (which we could even add to the physics solution). With the basic setup we can pretty much build any possible particle system we need and can do everything the default system can’t. The biggest and perhaps the only downside is that bigger, more complex system can cause too much of a performance drain.

So to end this post a couple of short cases of particle effects based upon the base particle class.

1. Particle trail

Sometimes you want a consistent trail of particles with a constant size. You cannot spawn a new particle each frame, because;

a. The distanced travelled can exceed the particle size and thus creating gaps
b. In slowmotion this would mean lots of particles would be spawned at almost the same place.

For this system I calculate the distance and direction between the systems current position and previous one. If this exceeds the size of the particle (with buffer) I fill the distance travelled with particles (not forgetting to update all particle settings accordingly).

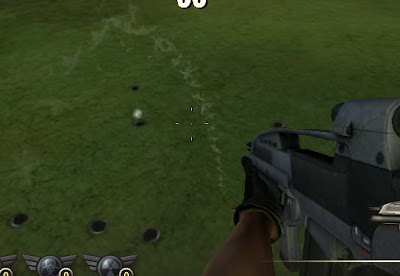
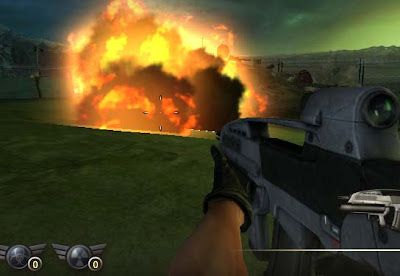
2. ‘Volume’ explosions

It always bothered me that our previous explosions always start from a single point and move outwards. While this would work perfectly for a grenade it always looks weird with bigger objects. I could spawn a explosion particle system and update it instantly at how it would look over 10 frames or so. I experimented with this, but I simply wanted an explosion to fill up the object. There were a couple of options. Iterate through all vertices of an object and spawn a particle at that world position. Still something I would like to test ;) but I didn’t expect this to be very fast. So for a quicker solution I opted to use the volume of the bounding of the object to define particle positions using a 3d grid. As I store bounding boxes of available meshes anyway this could be done fairly easy. You could say this won’t look nice with weird irregular shaped object and I agree ;) Nevertheless, most of it is blocked by smoke and fire and it all looks cool anyway!

I am off now!

Cheers

Pieter

vrijdag 17 juni 2011

Pleased to meet you

Hi all!

First of all, let me introduce myself. My name is Shirley, brand new production manager at Xform.
The previous 7 weeks felt like having a crash course in game production management.
Having my roots in theatre and media, working in the games industry is totally refreshing.

Although I have some experience in project management, managing an entire game production is new for me. But I really like it and day by day I am learning more about the production process.
For me the best way to learn is through practice. And that is why I am lucky to join Xform at this time of the year. At this moment we are working on several game projects and they are all very different.

Besides scheduling, meetings, reading and writing documents for these games, I also did some video editing.
So with this post I proudly present this teaser trailer. Please sit back and enjoy:


Yes, that's our Zombie Shooter game, which can be played online soon. So stay tuned!

- Shirley

P.S. If you know any good books about game production and -management, please let me know. :)

woensdag 15 juni 2011

Car physics

Dear readers,

It's been a while since I wrote. In the meantime I've been working on some racing games about which I cannot say much. What I can tell you about is how our cars are (roughly) implemented. First let's briefly explore an idea, evaluate it and then improve upon it.

We start with creating a rigid body: a physics object with properties such as mass, friction, linear velocity, etc. This rigid body collides with other physic objects such as our track. So let's create a rigid body (without the wheels for simplicity of explaining) with the shape of a car as shown below (sliding on ground):
Sliding and hovering
To move the car forward we can impulse the car in the direction it is facing. And to turn left or right we can apply an angular impulse. Tada! Done! Well no, not quite. One issue for example is that the car would regularly spin around wildly as it is moving over the track. This is because the car is constantly colliding with the track and the physic engine reacts upon the collisions with unwanted results.

To avoid the collisions we make the car hover over the track instead of sliding on it. One way to do this is by shooting a ray from the center of the car straight down (red arrow) and when the track is within the hover distance we impulse the car back up (countering gravity). In this way collisions are avoided (and we get a nice bounce effect as well) but when driving over the track we'd still have collisions when driving up a slope. We can avoid this by shooting more rays: from the four places of the wheels (blue arrows). We could even take this idea further and shoot multiple rays per wheel as shown below, but shooting rays is not for free and requires CPU cycles.
Shooting multiple rays per wheel
This is a rough and simplified explanation of how our cars work and it works quite well for our needs.

-- Stijn

vrijdag 10 juni 2011

Lightmaps

For the zombie shooter we're currently working on we want to have an atmospheric environment with light and dark areas. This is hard to achieve with directors/shockwaves default lighting system. It's possible to place some realtime Omi lights but only a few can be used and they won't give the result we're looking for. 


Instead of realtime lights we've decided to use lightmaps to tint the environment. A lightmap is simply put an extra texture image which contains the "baked" light information of a 3D scene.


Once the lightmap image has been made it can be superimposed on top of the 3D models original Diffuse texture giving the result as seen below. As you can see the color nuances of the lightmap image are transferred to the environment mesh. 


That's it for this post.

Cheers,
Matt

woensdag 1 juni 2011

Long time no see


It has been a while since our last blog update. And no... we weren't on holiday past few months! ;)
In fact we've been working on our new projects. One of them is our new upcoming zombie game! Shooting zombies from the first person perspective
.
At the beginning of this project I've been working mostly on the 3D models. The zombies themselves, but also on the environment in which the game takes place. But the past 3 weeks I did some programming. My main focus was the zombie AI. Which is, at first thought, not so hard... Just walk to your target to eat it's brains!

The main challenge was to create a system which guides the zombies through the environment without bumping/walking in to walls and other obstacles. Once again I got back my pathfinding system from Panic at the Zoo (PATZ), which worked pretty good in that game. But for this game it had it's drawbacks.
PATZ's pathfinding is grid based, not node based. Which wasn't a big deal since the environment of PATZ was small. But with the zombie project we want to have a bigger and more organical (not squarish, as with grid based systems) kind of space to work with. Therefore I decided to write a new pathfinding system which uses a node network based on a 3d mesh. A so called 'Navigation Mesh'.

To keep it short, each vertex in a so called 'Navigation Mesh' is a node, and the triangulation of the mesh for example, determines the node's connections. Since the nodes have connections and positions in 3D space it is possible to calculate paths between them. Currently the basic zombie AI is working and it is already pretty scary to see all of those zombies walking towards you...

Also, check out our brand new Facebook page about this project! :)

-Joep